Introduction
Who doesn’t love the irresistible combination of creamy cheesecake and juicy strawberries? Strawberry cheesecake has been a beloved dessert for decades, captivating taste buds with its balance of sweet, tangy, and rich flavors. Whether it’s a centerpiece for a celebration or a cozy weekend treat, strawberry cheesecake is versatile enough to suit any occasion.
In this guide, we’re diving deep into everything you need to know about strawberry cheesecake. From its origins and classic recipes to creative twists and expert tips, this article will transform you into a strawberry cheesecake connoisseur. Let’s start our sweet journey!
What is Strawberry Cheesecake?
The Origins and Evolution of Cheesecake
Cheesecake has a surprisingly ancient history, with its roots tracing back to Ancient Greece. Early versions were made with simple ingredients like honey and cheese, evolving over centuries into the rich and decadent dessert we know today. The introduction of cream cheese in the late 19th century gave cheesecake its signature creamy texture.
How Strawberry Cheesecake Became a Favorite
Strawberries and cheesecake are a match made in heaven. Their partnership likely started in the 20th century when chefs began experimenting with fresh fruit toppings. The sweetness of strawberries complements the tanginess of cheesecake perfectly, earning it a spot as one of the most popular dessert variations around the world.
Types of Strawberry Cheesecake
When it comes to strawberry cheesecake, there’s no one-size-fits-all recipe. The beauty of this dessert lies in its versatility, allowing you to choose a style that suits your taste, dietary needs, or occasion. Let’s explore some of the most popular variations.
Classic Baked Cheesecake
The baked version is the traditional style most people imagine when they think of strawberry cheesecake. Made with a rich mixture of cream cheese, eggs, and sugar, it’s baked to perfection, creating a dense and luscious texture. Topped with fresh strawberries or a glossy strawberry sauce, it’s an absolute crowd-pleaser.
Why Choose It?
- Ideal for formal occasions and celebrations.
- Offers a smooth and creamy texture that holds up well with toppings.
Challenges
- Baking can be tricky, with risks of cracks or overcooking.
No-Bake Strawberry Cheesecake
No-bake cheesecake is a lifesaver when you’re short on time or prefer a lighter dessert. Instead of eggs, it relies on cream cheese, whipped cream, and a setting agent like gelatin to create a fluffy, mousse-like texture. The best part? No oven is required!
Why Choose It?
- Perfect for summer or when you want a hassle-free recipe.
- Easier for beginners to master.
Challenges
- Requires proper refrigeration for the filling to set firmly.
Vegan and Gluten-Free Versions
For those with dietary restrictions, there are plenty of ways to enjoy strawberry cheesecake. Vegan recipes often use cashew cream, coconut milk, or dairy-free cream cheese as substitutes, while gluten-free versions swap out graham crackers for almond flour or gluten-free cookies.
Why Choose It?
- Inclusivity for guests with dietary needs.
- Maintains the rich, creamy flavor of traditional recipes with creative substitutes.
Challenges
- Some substitutes can be costly or harder to find.
Essential Ingredients
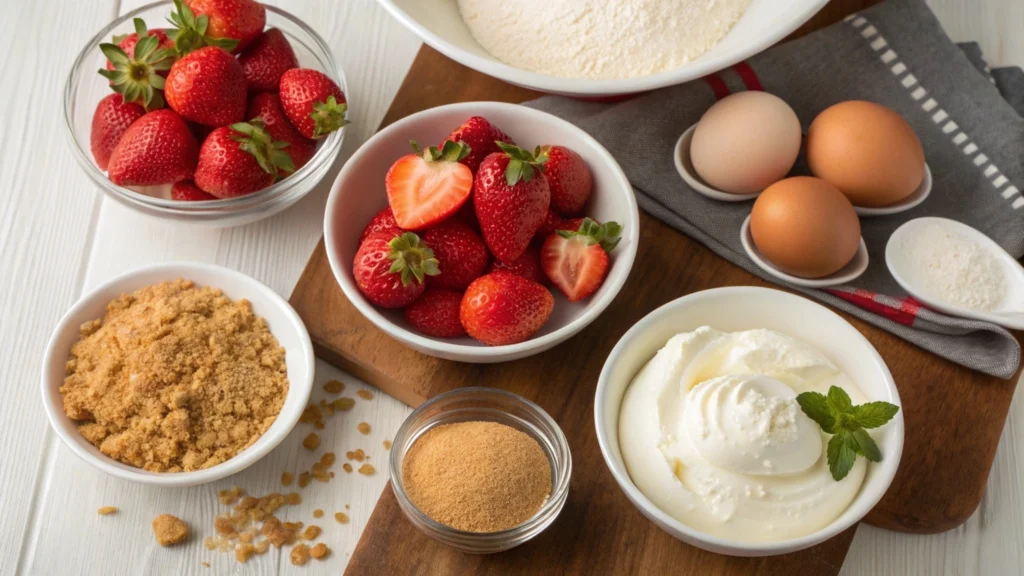
The magic of strawberry cheesecake lies in its perfect blend of textures and flavors. Achieving this balance starts with selecting the best ingredients. Each component plays a crucial role, from the creamy filling to the sweet and tangy topping. Let’s break down what you’ll need.
Core Ingredients
- Cream Cheese
The foundation of any cheesecake, cream cheese provides its signature smooth and creamy texture. For the best results, opt for full-fat cream cheese. It delivers the richest flavor and ensures a firm yet velvety consistency. - Strawberries
The star of the show! Whether you’re using fresh or frozen strawberries, their natural sweetness and slight tartness elevate the entire dessert. Choose vibrant red strawberries without blemishes for optimal flavor and presentation. - Sugar
Granulated sugar is essential for sweetening both the filling and the strawberry topping. It balances the tanginess of the cream cheese while enhancing the natural flavor of the strawberries. - Graham Crackers (or Alternative)
A classic cheesecake crust starts with crushed graham crackers mixed with melted butter. Want to mix things up? Try cookie crumbs, digestive biscuits, or even a nut-based crust for a unique twist. - Eggs (for Baked Cheesecake)
Eggs are the binding agent in baked cheesecake, giving it structure and that irresistible creamy firmness. They also contribute to the richness of the filling. - Heavy Cream or Sour Cream
These ingredients add moisture and lightness to the filling, creating a luscious, melt-in-your-mouth texture. Sour cream also adds a subtle tanginess that complements the strawberries. - Vanilla Extract
Vanilla enhances the overall flavor of the cheesecake and pairs beautifully with the strawberries. Use pure vanilla extract for the best taste.
Choosing the Best Strawberries
When it comes to strawberries, quality is key.
- Fresh Strawberries: These are ideal for a bright, fresh topping or garnish. Look for berries that are firm, juicy, and fragrant.
- Frozen Strawberries: Perfect for making compotes or sauces. They’re available year-round and often more economical.
- Organic Strawberries: Opt for organic if possible to avoid pesticides and enhance the natural flavor.
Optional Add-Ins
- Gelatin or Agar-Agar: Useful for no-bake recipes to help the filling set properly.
- Lemon Juice or Zest: Adds a refreshing zing that balances the sweetness of the dessert.
- Chocolate or Nuts: For creative crust or garnish variations.
With these essentials on hand, you’re ready to create a strawberry cheesecake that’s as delicious as it is beautiful.
Tools You Need
Creating the perfect strawberry cheesecake is as much about the tools as it is about the ingredients. While the recipe itself is straightforward, having the right equipment can make the process smoother and more enjoyable. Here’s a list of must-have tools and their uses.
Kitchen Essentials for Cheesecake
- Springform Pan
A springform pan is essential for making cheesecakes. Its removable sides allow you to release the dessert without damaging its edges. Choose a 9-inch or 10-inch pan for standard recipes. - Mixing Bowls
Multiple bowls in varying sizes are necessary for preparing the crust, filling, and toppings separately. Opt for sturdy, non-slip bowls for easier handling. - Electric Mixer (Handheld or Stand Mixer)
Achieving the creamy consistency of cheesecake filling requires thorough mixing. An electric mixer ensures the cream cheese is smooth and lump-free, making your job faster and easier. - Rubber Spatula
A rubber spatula is perfect for scraping every last bit of filling from your mixing bowl. It’s also handy for spreading the filling evenly in the pan. - Measuring Cups and Spoons
Accurate measurements are crucial in baking. A complete set of measuring tools ensures you use the correct amounts of each ingredient. - Food Processor or Blender
For crushing graham crackers or cookies into fine crumbs, a food processor is a lifesaver. It’s also useful for blending strawberries into a smooth purée for the topping. - Whisk
A whisk is useful for mixing smaller quantities of ingredients, such as eggs, sugar, or whipped cream, ensuring a uniform consistency.
Special Equipment for a Perfect Finish
- Offset Spatula
This tool is great for smoothing the top of your cheesecake and spreading toppings evenly. It helps create a professional-looking finish. - Water Bath (for Baked Cheesecake)
A water bath, or bain-marie, is essential for even cooking and preventing cracks in baked cheesecakes. You’ll need a large roasting pan and aluminum foil to create a protective barrier around the springform pan. - Cooling Rack
Proper cooling is key to maintaining the texture of your cheesecake. A cooling rack allows air to circulate, preventing condensation from forming on the bottom of the pan. - Decorating Tools
If you want to take your presentation to the next level, consider tools like piping bags for whipped cream or decorative toppings.
Optional Extras
- Zester: For adding citrus zest to your filling or topping.
- Pastry Brush: Handy for applying a light glaze to fresh strawberries.
- Cake Stand: Elevates your cheesecake presentation and makes serving easier.
Equipped with these tools, you’re well on your way to creating a strawberry cheesecake that looks as amazing as it tastes.
How to Make a Classic Strawberry Cheesecake
Now comes the fun part: crafting your very own strawberry cheesecake! Follow this step-by-step guide to create a dessert that’s creamy, rich, and bursting with the sweet-tart flavor of strawberries.
Step 1: Preparing the Crust
The crust provides the foundation of the cheesecake, adding a delightful crunch to complement the creamy filling.
Ingredients for the Crust
- 1 ½ cups graham cracker crumbs (or alternative like digestive biscuits)
- ¼ cup granulated sugar
- 6 tablespoons unsalted butter, melted
Instructions
- Crush the Crackers: Use a food processor to grind graham crackers into fine crumbs. If you don’t have a food processor, place the crackers in a zip-lock bag and crush them with a rolling pin.
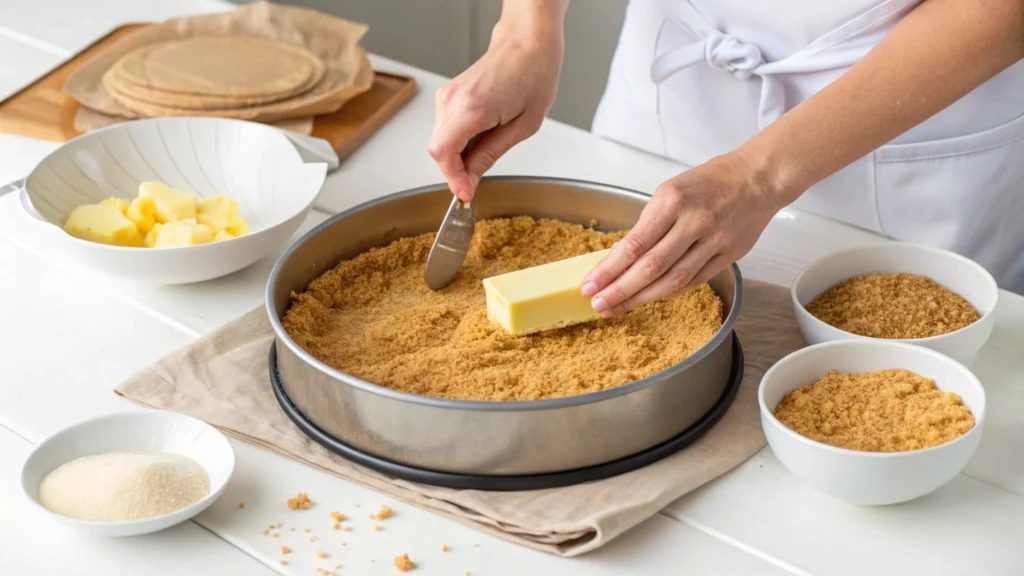
- Mix the Crust: In a mixing bowl, combine the crumbs, sugar, and melted butter. Stir until the mixture resembles wet sand.
- Press into the Pan: Transfer the mixture to a springform pan. Use the back of a spoon or a flat-bottomed glass to press it evenly onto the bottom (and slightly up the sides, if desired).
- Pre-Bake (Optional): For added crispiness, bake the crust at 350°F (175°C) for 10 minutes, then let it cool before adding the filling.
Step 2: Making the Filling
The filling is the heart of the cheesecake. Smooth and creamy, it pairs perfectly with the crust and strawberry topping.
Ingredients for the Filling
- 24 ounces (3 blocks) cream cheese, softened
- 1 cup granulated sugar
- 1 teaspoon vanilla extract
- 3 large eggs
- ½ cup sour cream or heavy cream
Instructions
- Prepare the Cream Cheese: Allow the cream cheese to come to room temperature for easy mixing. Beat it in a large bowl using an electric mixer until smooth.
- Add Sugar and Vanilla: Gradually add the sugar and vanilla extract, mixing until fully incorporated.
- Incorporate the Eggs: Add the eggs one at a time, mixing on low speed after each addition to avoid overmixing.
- Blend in the Cream: Add sour cream or heavy cream, mixing just until smooth.
Pour the Filling:
Pour the filling over the prepared crust, spreading it evenly with a spatula.
Step 3: Baking the Cheesecake
Baking the cheesecake properly is crucial to achieving that velvety texture without cracks.
Instructions
- Water Bath Prep: Wrap the bottom of the springform pan tightly with aluminum foil to prevent water leakage. Place the pan in a large roasting pan.
- Add Hot Water: Pour hot water into the roasting pan, about halfway up the sides of the springform pan.
- Bake: Preheat the oven to 325°F (160°C). Bake the cheesecake for 60-70 minutes, or until the edges are set, but the center still jiggles slightly when shaken.
- Cool Gradually: Turn off the oven and leave the cheesecake inside with the door slightly ajar for 1 hour. Then transfer it to a cooling rack.
Step 4: Adding the Strawberry Topping
The strawberry topping adds vibrant color and fruity flavor to your cheesecake.
Ingredients for the Topping
- 2 cups fresh or frozen strawberries
- ¼ cup granulated sugar
- 1 tablespoon lemon juice
- 1 teaspoon cornstarch (optional, for thickening)
Instructions
- Cook the Strawberries: In a saucepan over medium heat, combine strawberries, sugar, and lemon juice. Cook until the berries break down and release their juices, about 10 minutes.
- Thicken the Sauce: For a thicker topping, dissolve cornstarch in 1 tablespoon of water and stir it into the strawberry mixture. Simmer until slightly thickened.
- Cool: Let the topping cool to room temperature before spreading it over the chilled cheesecake.
Step 5: Chill and Serve
- Refrigerate: Allow the cheesecake to chill in the refrigerator for at least 4-6 hours, or overnight for best results.
- Decorate: Before serving, top with fresh strawberry slices or whipped cream for added flair.
Congratulations, you’ve just made a classic strawberry cheesecake!
No-Bake Strawberry Cheesecake Recipe
If you’re short on time or prefer a lighter, mousse-like texture, the no-bake strawberry cheesecake is a fantastic alternative to the classic baked version. It’s easy to make and doesn’t require an oven—perfect for summer days or when you want a stress-free dessert.
Ingredients for No-Bake Strawberry Cheesecake
Crust:
- 1 ½ cups graham cracker crumbs
- 6 tablespoons unsalted butter, melted
- 2 tablespoons granulated sugar
Filling:
- 16 ounces (2 blocks) cream cheese, softened
- 1 cup powdered sugar
- 1 teaspoon vanilla extract
- 1 cup heavy whipping cream, chilled
- ½ cup strawberry purée (fresh or frozen strawberries blended into a smooth paste)
Strawberry Topping:
- 1 cup fresh strawberries, sliced
- ½ cup strawberry jam
Instructions
Prepare the Crust
- Mix the Ingredients: Combine the graham cracker crumbs, melted butter, and sugar in a bowl. Stir until the mixture resembles wet sand.
- Press into the Pan: Transfer the mixture to a 9-inch springform pan and press it evenly onto the bottom. Use the back of a spoon or a flat-bottomed glass to compact the crust.
- Chill the Crust: Place the pan in the refrigerator for at least 30 minutes to set while you prepare the filling.
Make the Filling
- Whip the Cream: In a chilled mixing bowl, use an electric mixer to beat the heavy whipping cream until stiff peaks form. Set aside.
- Mix Cream Cheese and Sugar: In a separate large bowl, beat the softened cream cheese with powdered sugar and vanilla extract until smooth and creamy.
- Add Strawberry Purée: Fold in the strawberry purée, mixing until evenly incorporated.
- Combine with Whipped Cream: Gently fold the whipped cream into the cream cheese mixture. Be careful not to deflate the cream, as this keeps the filling light and airy.
Assemble the Cheesecake
- Add the Filling: Pour the filling over the chilled crust. Smooth the top with a spatula for an even surface.
- Chill: Cover the pan with plastic wrap and refrigerate the cheesecake for at least 4-6 hours, or until the filling is firm.
Prepare the Strawberry Topping
- Mix the Jam and Strawberries: In a bowl, combine the strawberry jam and sliced strawberries. Mix gently to coat the strawberries with the jam.
- Top the Cheesecake: Spread the strawberry topping over the chilled cheesecake. Arrange the strawberries in an aesthetically pleasing pattern if desired.
Serve and Enjoy
- Remove from the Pan: Carefully release the sides of the springform pan.
- Slice and Serve: Use a sharp knife to cut clean slices. Serve immediately and enjoy the creamy, fruity delight!
Tips for Success
- Keep Ingredients Cold: Cold ingredients, especially the heavy cream, whip up better and create a more stable filling.
- Chill Thoroughly: Patience is key. Letting the cheesecake set for several hours ensures the filling holds its shape.
- Experiment with Flavors: Add a touch of lemon zest to the filling for a refreshing citrus twist, or swirl in a bit of strawberry jam for added flair.
Creative Variations of Strawberry Cheesecake
While the classic and no-bake versions of strawberry cheesecake are timeless, adding creative twists can elevate this dessert to a whole new level. Whether you’re hosting a party or simply want to try something different, these variations will inspire your culinary adventures.
Mini Strawberry Cheesecakes
Perfect for individual servings, mini cheesecakes are as adorable as they are delicious.
How to Make Them:
- Crust: Press graham cracker crust into the bottoms of a muffin tin lined with paper liners.
- Filling: Add your classic or no-bake cheesecake filling.
- Topping: Top with a dollop of strawberry sauce or a fresh strawberry slice.
Why You’ll Love It:
- Great for portion control.
- Perfect for parties and picnics.
Layered Cheesecake Jars
Layered cheesecake jars are visually stunning and portable.
How to Make Them:
- Layer the Crust: Add a spoonful of graham cracker crumbs to the bottom of a mason jar.
- Add Layers: Alternate layers of cheesecake filling and strawberry purée or sauce.
- Top It Off: Finish with a fresh strawberry or whipped cream.
Why You’ll Love It:
- Easy to customize flavors in each jar.
- A fun dessert for casual gatherings or gifts.
Strawberry Swirl Cheesecake
A swirl of strawberry sauce in the filling creates a marbled effect that’s both elegant and flavorful.
How to Make It:
- Prepare the Filling: Add dollops of strawberry purée to the cheesecake filling before baking.
- Create the Swirl: Use a toothpick or knife to gently swirl the purée into the filling.
- Bake: Follow the instructions for a classic cheesecake.
Why You’ll Love It:
- Beautiful presentation with minimal effort.
- A great way to incorporate more strawberry flavor.
Chocolate Strawberry Cheesecake
Combine the decadence of chocolate with the sweetness of strawberries for a gourmet treat.
How to Make It:
- Crust: Use crushed chocolate cookies instead of graham crackers.
- Filling: Mix melted dark chocolate into the cheesecake filling for a chocolate base.
- Topping: Add fresh strawberries and drizzle with chocolate ganache.
Why You’ll Love It:
- A luxurious twist for chocolate lovers.
- Perfect for romantic occasions or indulgent desserts.
Frozen Strawberry Cheesecake Pops
Turn cheesecake into a refreshing summer snack with frozen pops.
How to Make Them:
- Prepare the Mixture: Blend no-bake cheesecake filling and strawberry purée.
- Pour into Molds: Use popsicle molds or small cups with sticks.
- Freeze: Freeze until firm, about 4-6 hours.
Why You’ll Love It:
- Kid-friendly and portable.
- Great for hot summer days.
Strawberry Cheesecake Tart
A tart version of strawberry cheesecake is a refreshing twist on the classic dessert.
How to Make It:
- Tart Shell: Use a buttery pastry crust instead of a graham cracker base.
- Filling: Use a lighter filling with mascarpone cheese or whipped cream.
- Topping: Decorate with strawberry slices in an overlapping pattern for an elegant look.
Why You’ll Love It:
- Elegant and perfect for special occasions.
- A delicate alternative to traditional cheesecake.
Strawberry Cheesecake Brownies
Combine two desserts into one irresistible treat.
How to Make Them:
- Prepare Brownie Batter: Bake a fudgy brownie base.
- Add Cheesecake Layer: Spread cheesecake filling on top.
- Swirl: Add strawberry sauce and swirl with a knife.
- Bake: Continue baking until the layers set.
Why You’ll Love It:
- Combines chocolate, cream cheese, and strawberries in every bite.
- Great for those who love rich, layered desserts.
Common Mistakes in Making Strawberry Cheesecake (and How to Avoid Them)
Even experienced bakers can run into issues when making strawberry cheesecake. From cracks in the filling to soggy crusts, here’s a list of common pitfalls and how you can prevent them for a flawless dessert every time.
1. Cracks in the Cheesecake
The Problem:
One of the most common issues with baked cheesecakes is cracking on the surface. This typically happens due to overbaking or sudden temperature changes.
How to Avoid It:
- Don’t Overbake: The cheesecake is done when the edges are set, but the center still jiggles slightly. It will firm up as it cools.
- Use a Water Bath: A water bath ensures even cooking and prevents the cheesecake from drying out.
- Cool Gradually: Avoid sudden temperature changes by letting the cheesecake cool in the oven with the door slightly open for an hour after baking.
2. Lumpy Filling
The Problem:
If the filling isn’t smooth, it can ruin the texture of your cheesecake. Lumps usually occur if the cream cheese isn’t softened properly before mixing.
How to Avoid It:
- Use Room Temperature Ingredients: Let cream cheese sit out for at least 30 minutes before mixing.
- Beat Thoroughly: Use an electric mixer to beat the cream cheese until it’s completely smooth before adding other ingredients.
3. Soggy Crust
The Problem:
A soggy crust can happen when moisture from the filling seeps into the base, especially in a baked cheesecake.
How to Avoid It:
- Pre-Bake the Crust: Baking the crust for 10 minutes before adding the filling helps it stay firm.
- Wrap the Pan Properly: When using a water bath, ensure the springform pan is tightly wrapped in aluminum foil to prevent water from leaking into the crust.
- Chill Well: For no-bake cheesecakes, refrigerate the crust long enough to firm up before adding the filling.
4. Filling Doesn’t Set
The Problem:
Your cheesecake might remain runny or too soft if the filling isn’t mixed or cooked properly.
How to Avoid It:
- Measure Carefully: Follow the recipe exactly, especially when using thickening agents like eggs or gelatin.
- Bake Long Enough: For baked cheesecakes, ensure the filling is cooked through without overbaking.
- Chill Thoroughly: No-bake cheesecakes need to refrigerate for at least 4-6 hours to set properly.
5. Overmixing the Filling
The Problem:
Overmixing can incorporate too much air into the filling, leading to a puffed-up texture that collapses as it cools.
How to Avoid It:
- Mix Gently: Use low speed on your mixer, especially after adding eggs.
- Avoid Overworking Eggs: Once the eggs are added, mix only until incorporated.
6. Bland Flavor
The Problem:
A cheesecake that lacks flavor can feel disappointing, especially if the strawberry topping isn’t vibrant enough.
How to Avoid It:
- Use High-Quality Ingredients: Opt for fresh, ripe strawberries and pure vanilla extract.
- Balance Sweetness and Tartness: Add a splash of lemon juice or zest to enhance the flavors.
- Taste the Mixture: Adjust sugar and other seasonings before baking or setting.
7. Topping Issues
The Problem:
Strawberry topping might slide off or not adhere to the cheesecake.
How to Avoid It:
- Cool the Cheesecake: Ensure the cheesecake is fully chilled before adding the topping.
- Thicken the Topping: Use cornstarch or gelatin in your strawberry sauce for better adhesion.
8. Difficult Removal from the Pan
The Problem:
Removing the cheesecake from the springform pan can damage the edges or base.
How to Avoid It:
- Grease the Pan: Lightly grease the sides of the springform pan before adding the filling.
- Run a Knife Along the Edges: Before releasing the pan, run a warm knife around the edge to loosen the cheesecake.
Storing, Serving, and Pairing Tips for Strawberry Cheesecake
Strawberry cheesecake isn’t just about making it perfect—it’s also about how you store, serve, and pair it to elevate the experience. Whether you’re saving leftovers or impressing guests, these tips will ensure your cheesecake shines at its best.
How to Store Strawberry Cheesecake
Short-Term Storage
- Refrigerate: Store your cheesecake in the refrigerator, covered with plastic wrap or aluminum foil, to keep it fresh.
- Keep It Airtight: Use a cake carrier or an airtight container to prevent the cheesecake from absorbing other odors in the fridge.
- Duration: Cheesecake stays fresh for up to 5 days when refrigerated.
Freezing Cheesecake
- Prepare for Freezing: To freeze, wrap the cheesecake tightly in plastic wrap, followed by aluminum foil, to prevent freezer burn.
- Slice First: For easy serving later, cut the cheesecake into individual slices and wrap each slice separately before freezing.
- Storage Duration: Frozen cheesecake can last up to 3 months.
- Thawing: Thaw overnight in the refrigerator before serving. Avoid thawing at room temperature to prevent a soggy texture.
Serving Strawberry Cheesecake
Best Temperature for Serving
- Chilled but Not Too Cold: Cheesecake tastes best when it’s slightly chilled. Remove it from the fridge 15-20 minutes before serving to enhance its creamy texture.
Presentation Tips
- Clean Slices: Use a sharp knife dipped in warm water, wiping it clean between slices for neat, professional-looking cuts.
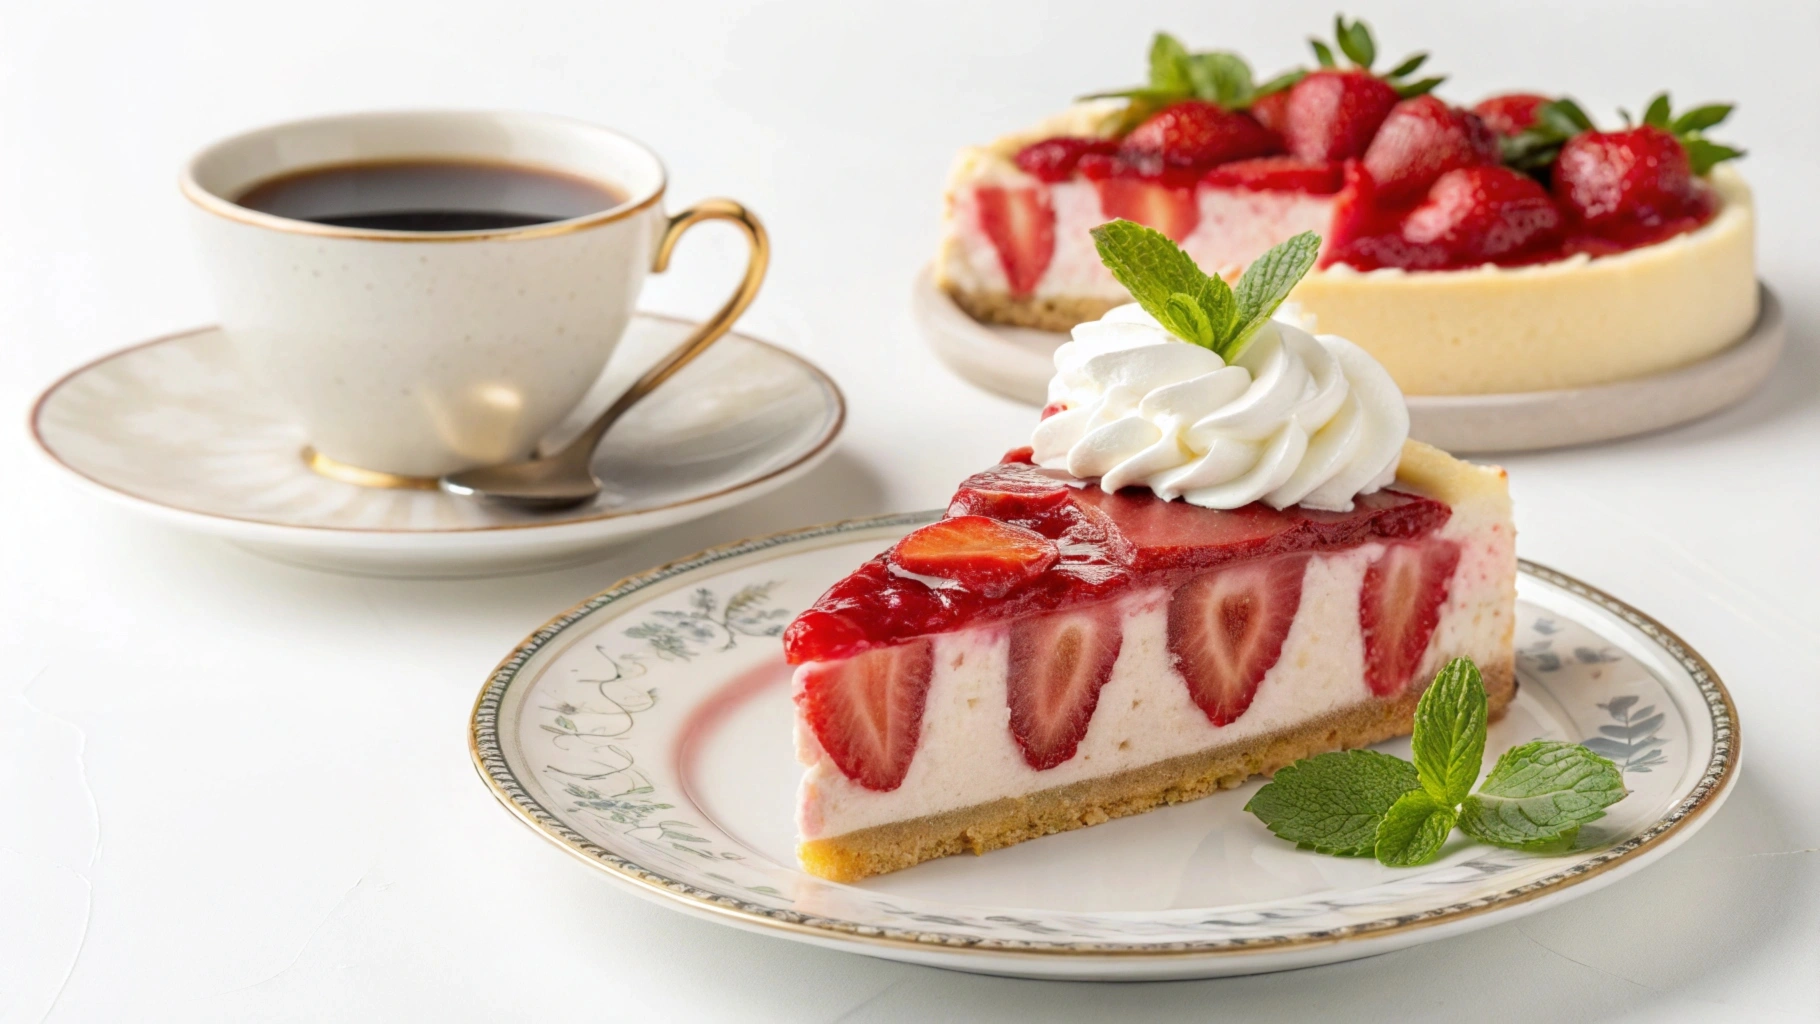
- Garnish Creatively: Add a dollop of whipped cream, mint leaves, or extra strawberry slices for a polished presentation.
- Plating: Serve on dessert plates with a drizzle of strawberry sauce or a sprinkle of powdered sugar for added flair.
Pairing Strawberry Cheesecake with Other Flavors
Drinks
- Coffee: A cup of rich coffee, espresso, or cappuccino complements the creamy texture and strawberry sweetness.
- Tea: Opt for light, fruity teas like chamomile, hibiscus, or green tea.
- Wine: Pair with a semi-sweet wine like Moscato or a light rosé for a luxurious treat.
Additional Toppings
- Chocolate Drizzle: Melted dark or milk chocolate adds decadence to each bite.
- Nuts: Crushed almonds, pecans, or pistachios provide a delightful crunch.
- Coconut Flakes: Lightly toasted coconut can add an exotic twist to your cheesecake.
Side Desserts
- Fresh Berries: Serve with a medley of blueberries, raspberries, or blackberries for added color and flavor.
- Ice Cream: Vanilla or strawberry ice cream pairs beautifully with cheesecake for an indulgent combination.
- Cookies or Biscuits: Offer crisp cookies on the side for contrast in texture.
Frequently Asked Questions (FAQs) About Strawberry Cheesecake
Here are some of the most commonly asked questions about strawberry cheesecake, along with clear and concise answers to help you master this delightful dessert.
1. Is strawberry cheesecake healthy?
Strawberry cheesecake is a decadent dessert and is best enjoyed in moderation. While it contains calcium from cream cheese and vitamin C from strawberries, it’s also high in sugar and fat. To make a healthier version, you can:
- Use low-fat cream cheese or Greek yogurt.
- Substitute sugar with a natural sweetener like honey or stevia.
- Opt for a nut-based crust instead of graham crackers.
2. Can you freeze strawberry cheesecake?
Yes, you can freeze strawberry cheesecake! Here’s how:
- Wrap the cheesecake tightly in plastic wrap and then aluminum foil.
- For individual slices, wrap each slice separately before freezing.
- Cheesecake can be stored in the freezer for up to 3 months.
- To serve, thaw overnight in the refrigerator.
3. How long does strawberry cheesecake last?
- Refrigerated: It lasts up to 5 days in the fridge if stored properly in an airtight container or wrapped in plastic wrap.
- Frozen: When frozen, it remains fresh for up to 3 months.
4. Why does my cheesecake crack?
Cracking usually happens due to overbaking, rapid cooling, or air bubbles in the filling. To prevent this:
- Bake the cheesecake in a water bath for even heat distribution.
- Turn off the oven after baking and let the cheesecake cool gradually inside with the door slightly open.
- Avoid overmixing the filling to reduce air bubbles.
5. Can I make strawberry cheesecake without a springform pan?
Yes! While a springform pan is ideal, you can use:
- A pie dish for a rustic look.
- Individual ramekins for mini cheesecakes.
- A rectangular baking dish for cheesecake bars.
Line the dish with parchment paper for easy removal, especially for no-bake recipes.
6. How can I make my strawberry topping thicker?
To thicken your strawberry topping:
- Add 1 teaspoon of cornstarch mixed with 1 tablespoon of water to the strawberry sauce.
- Simmer for a few minutes until it reaches the desired consistency.
- Alternatively, use gelatin for a firmer topping.
7. Can I use frozen strawberries instead of fresh?
Yes, frozen strawberries work perfectly for making compotes or sauces. Just thaw and drain them before use to remove excess water. Fresh strawberries are better for garnishes and decorations due to their firm texture.
8. Can I make a vegan or gluten-free version of strawberry cheesecake?
Absolutely!
- Vegan Version: Replace cream cheese with cashew cream or a dairy-free cream cheese. Use coconut cream or almond milk in place of heavy cream.
- Gluten-Free Version: Swap the graham cracker crust for a crust made with almond flour or gluten-free cookies.
9. What’s the best way to serve strawberry cheesecake at a party?
For parties:
- Pre-slice the cheesecake for easy serving.
- Decorate each slice with fresh strawberries and a dollop of whipped cream.
- Use mini cheesecake molds or jars for individual servings.
10. Can I make strawberry cheesecake ahead of time?
Yes, strawberry cheesecake is an excellent make-ahead dessert.
- Prepare the cheesecake a day or two in advance.
- Store it in the refrigerator until ready to serve.
- Add the topping just before serving for the freshest presentation.
Conclusion
Strawberry cheesecake is more than a dessert—it’s a classic treat loved by many. Its rich and creamy texture blends perfectly with the sweet and tangy taste of strawberries. Whether you make a baked cheesecake, a no-bake version, or a creative twist, this dessert is always a winner.
With the tips and recipes in this guide, you can make a strawberry cheesecake that everyone will enjoy. From choosing the best ingredients to serving it with flair, you’re ready to take on this tasty project. So grab your tools and ingredients and make a strawberry cheesecake that will impress everyone!